2018-10-28 (Updated: 2021-01-05)
Aesthetic, Low-fidelity & Low-bandwith Image Rendering.
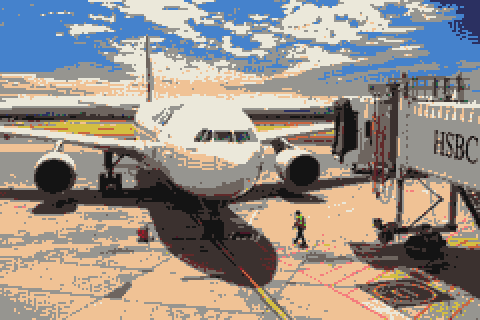
ImageQuantizer turns photos into a low resolution PNG file that minimises bandwidth and load time. The colours are coordinated with a predetermined colour palette.

Below I detail how I resize the images, quantize and dither the colours and ultimately compress the resulting image.
This project’s goals are:
This technique was inspired by Low-tech Magazine’s use of dithered images in an effort to reduce bandwidth. Their results were (IMHO) mediocre. While the aesthetic they achieved was suitable, the bandwidth savings could have been much better.
NOTE: I will update this page soon with more information and some examples. In the meantime you can see some of the results on this website.
ImageMagick is the engine I use to drive the image processing. Read this article on Color Quantization and Dithering for too much information.
One of the obvious ways to reduce the size of the an image is to limit the number of colours in the image. To provided a more homogenous look to the web page, I wanted to restrict all colours on the website to a single palette.
The palette I chose was Master-16 from Lospec, downloaded in the “PNG Image (1x)” format.

If you would like to create a colour palette yourself from an existing image, you can use ImageMagick as follows:
convert source.jpg \
    -colors 32 -unique-colors \
    -colors 8 -unique-colors \
-type Palette palette.pngTo further reduce the size and visual strain of an image, I opted to reduce the resolution so that the final image would be 0.5x (the oposite of retina 2x). To manage browser scaling, I found it best to then multiply the final image to the desired display resolution.
So for an image to be displayed at 480px, we need to reduce the source image to 240px, then scale back up to 480px. We do this using the following commands in ImageMagick:
convert source.jpg \
    -resize 240x240 \
    # do processing stuff here...
    -filter point -resize 480x480 \
output.jpgHere is where the magic(k?) happens. Once resized, we need reduce the colours and determine how they are mapped. Here’s how I ended up getting consistent results I’m happy with.
After resizing the image, we ensure that there is no transparency
(i.e. source could be a PNG file with an alpha channel). We use
-background white and -alpha remove to achieve
this.
Next, we need to recolour the image. This is a multi-stage process where we:
-quantize sRGB);-define 'dither:diffusion-amount=1%'
-dither FloydSteinberg);-auto-level);
and,-remap palette.png).This all comes to gether and looks something like this:
convert source.jpg \
    -resize 240x240 \
    -background white -alpha remove \
    \( -quantize sRGB -define 'dither:diffusion-amount=1%' \
    -dither FloydSteinberg -auto-level -remap palette.png \) \
    -filter point -resize 480x480 \
-type Palette out.png(-type Pallet tells ImageMagick we are creating an image
with a fixed number of colours.)
© 2017–2024 Luke Pullella, all rights reserved.
Hosting provided by SDF Public Access UNIX System, Inc.
[4C1367D] 2021-01-05 09:24:48 +0800 AWST